VHF / HF Ham Radio Go-Kit
Under Development, I'll have more details soon!
This how to web page is still under development. The following is instructions on how to build out a Ham-Radio go kit or at least provide some ideas that you could build your own kit. I would like to make a shout out to Herriman Amatuer Radio Club (HARC - N7HRC), Utah for the original design. It is important to note that this particular kit is not EMP shielded and would need to be stored in a shielded container. Discussions about EMP and EMP Shielding will not be discussed in this build article.
Images


Parts List
- Purchasing and ordering parts and resources to complete the build out. Details go here.
-
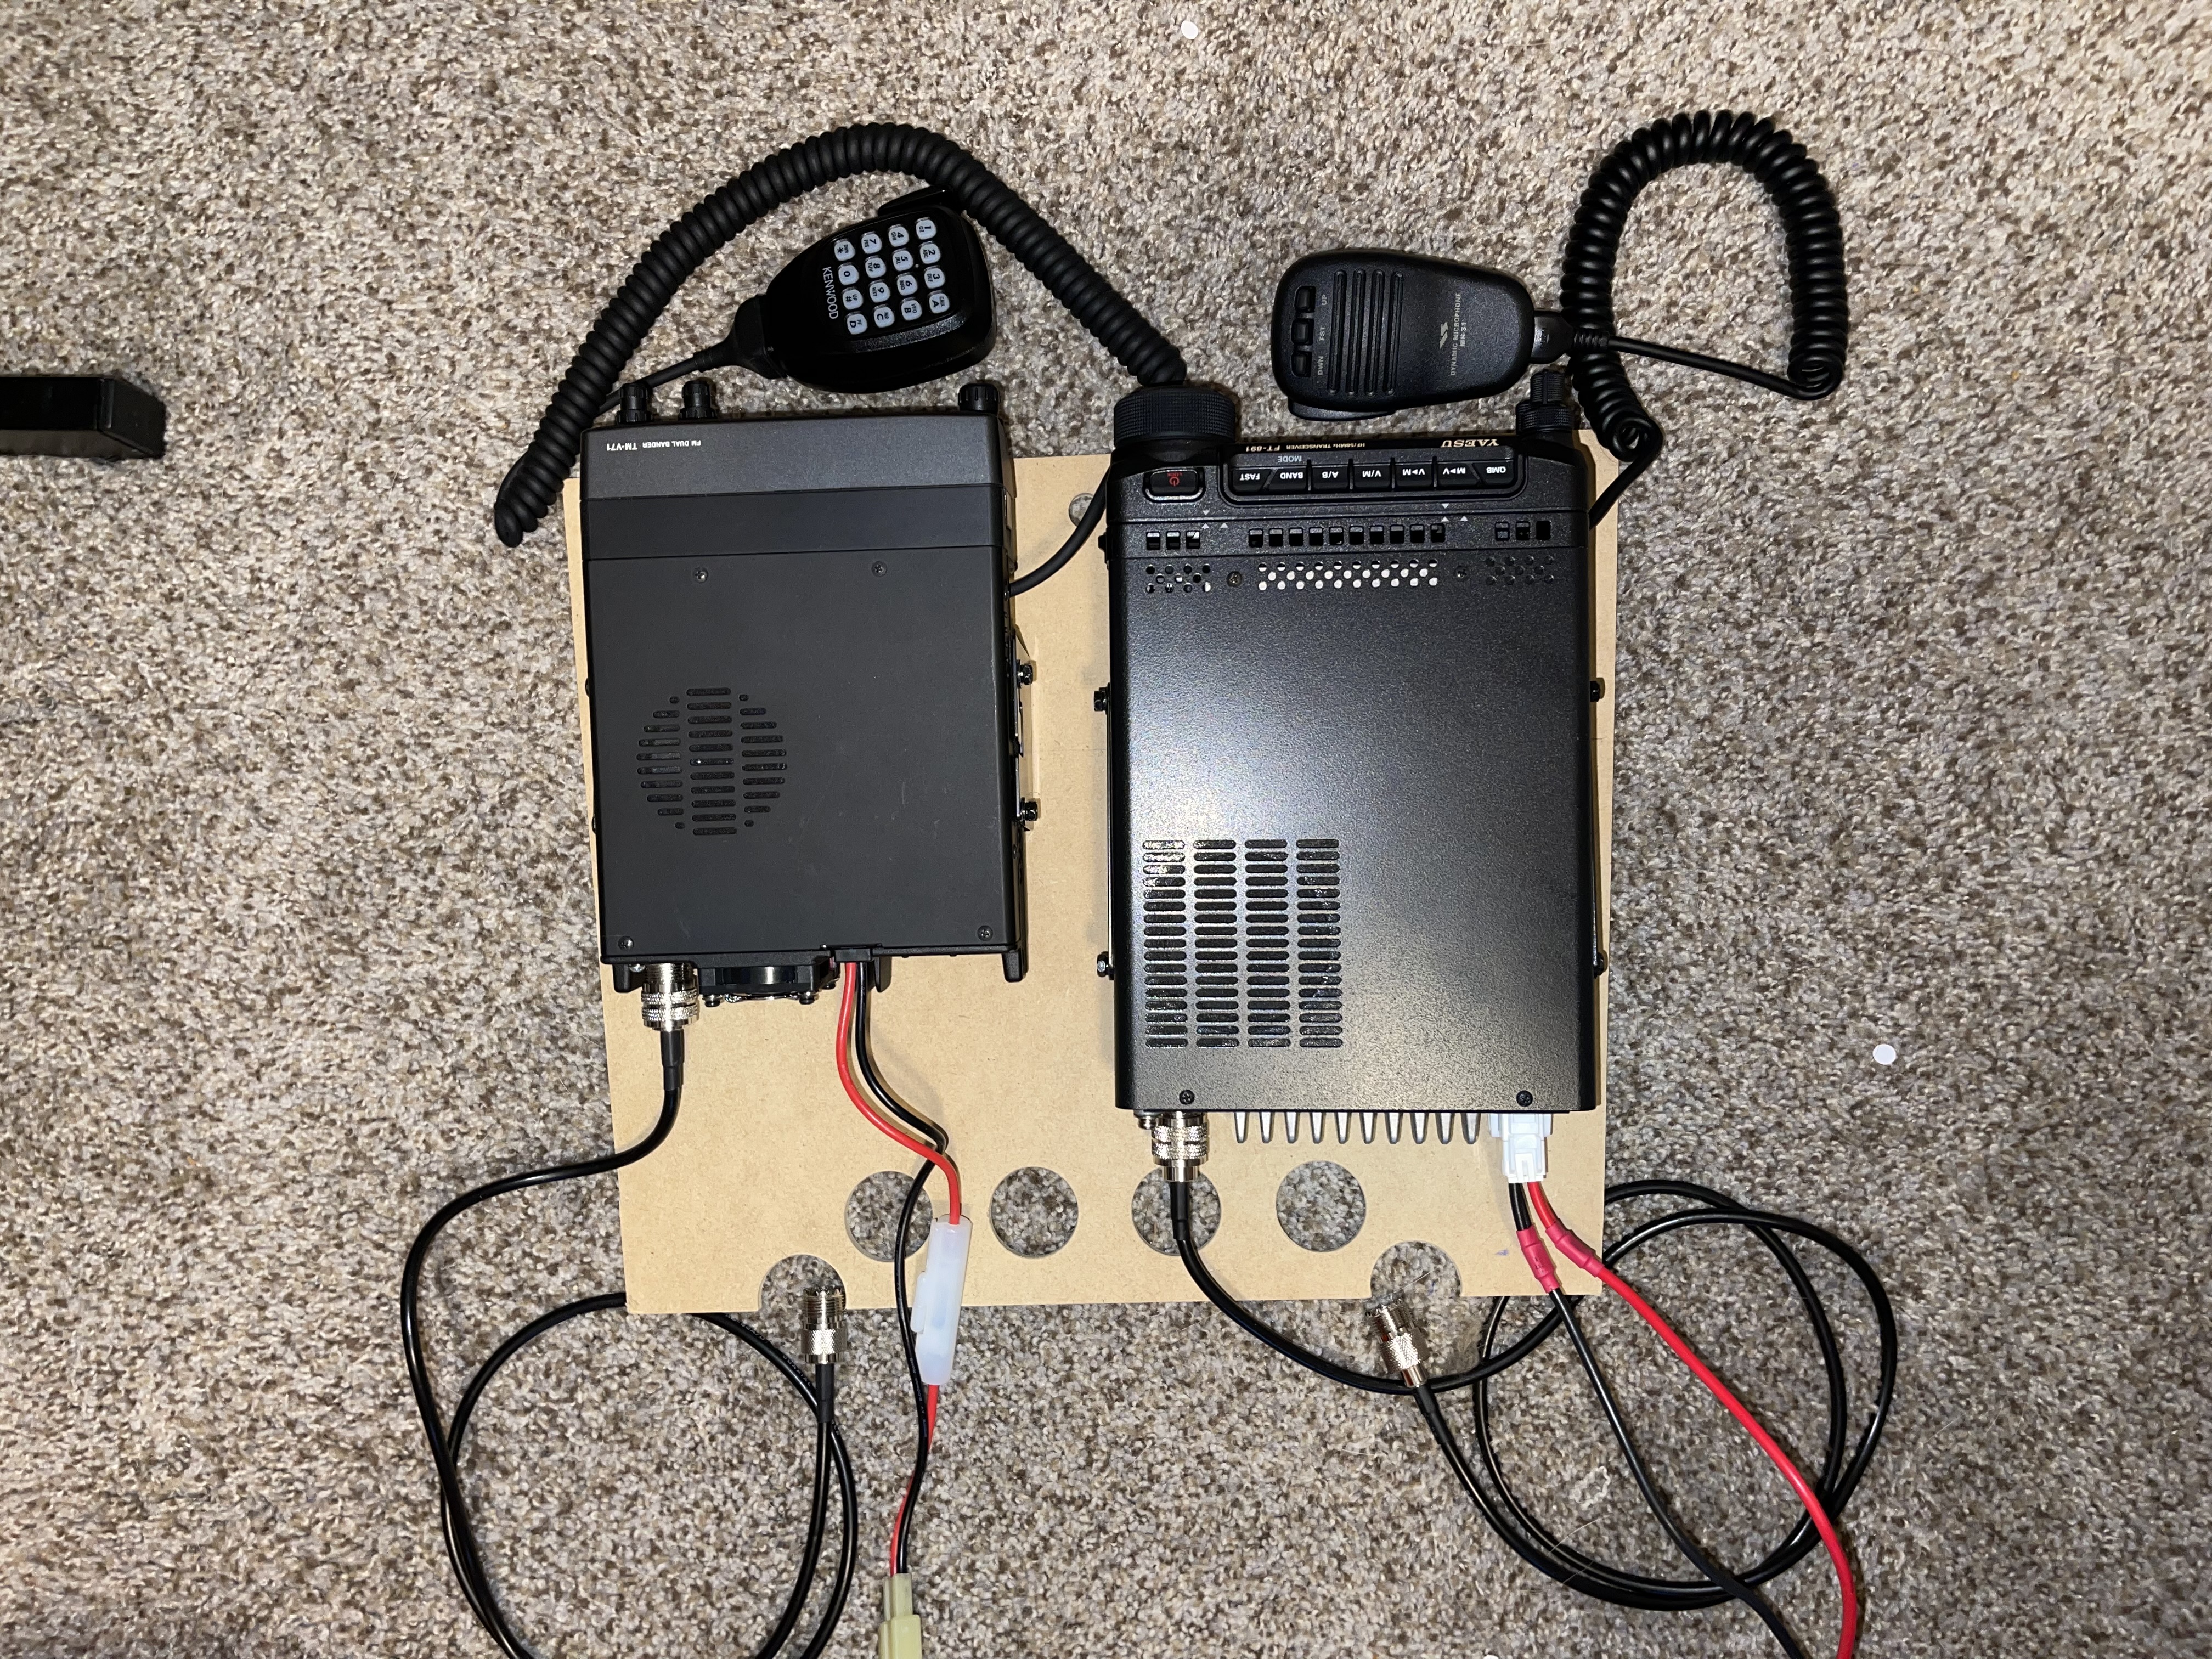
Kenwood TM-V71A - VHF/UHF

Alternately you could purchase a HF radio of similar dimensions and power requirements and swap out the VHF / UHF parts with HF based parts.
-
Kenwood TM-V71 - Programming Cable and Software

-
Yaesu FT891 - HF/50

In my case I decided to add the FT891 HF / 50 MHz radio to my kit, which now includes both the Kenwood TM-V71A and the Yaesu FT891.
-
Yeasu FT-891 Radio Programming Cable and Software

-
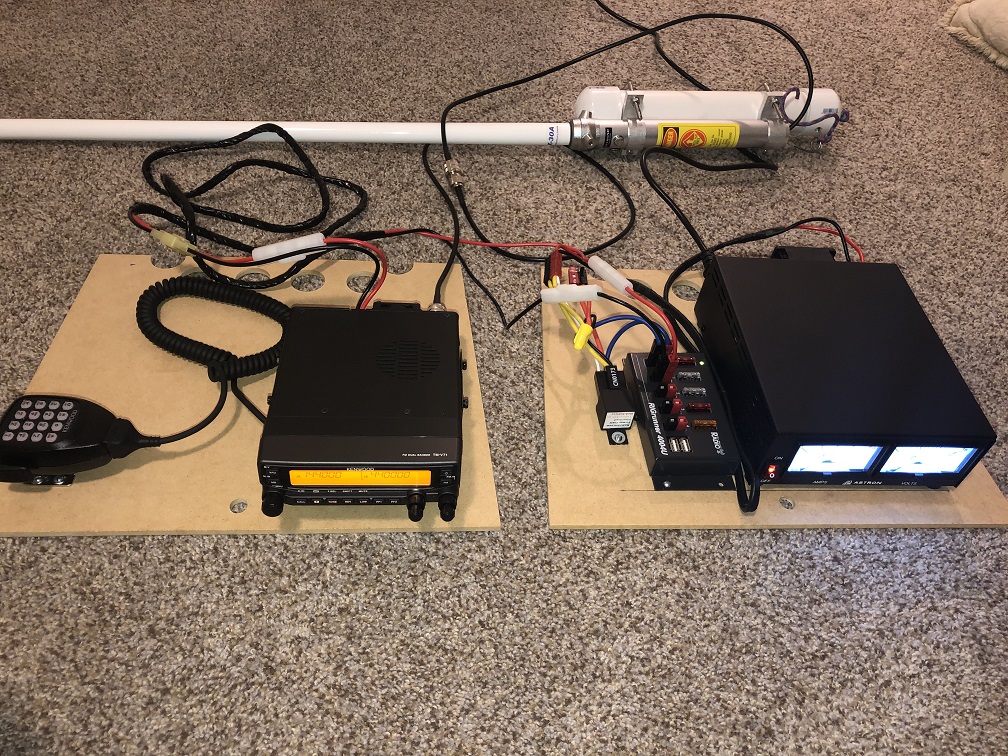
X30A Dualband Base/Repeater Antenna

-
MTM Sportsman Plus Utility Dry Box Polymer

-
Astron SS Series Switching Power Supplies SS-30M

-
Power Gate Battery Backup Automatic DC Power Switching System


-
West Mountain PS-CBL-6 Cable (PS/CBL/6)
")
-
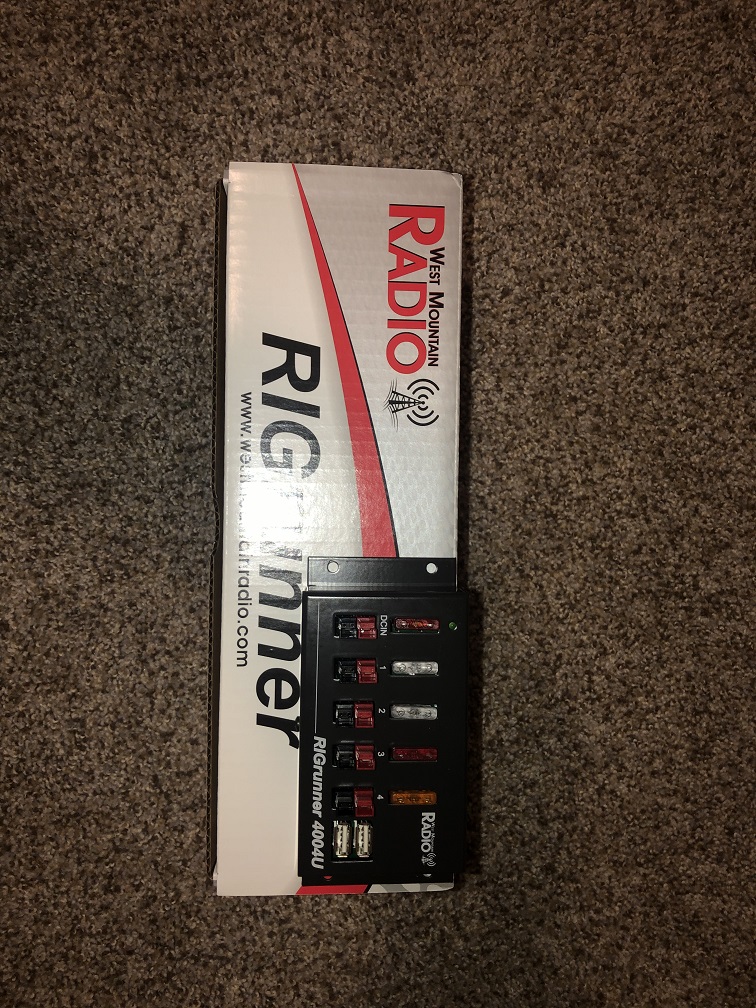
West Mountain Radio RIGrunner DC Outlet Panels RR/4004/USB

-
Heavy Duty Portable Antenna Mounting Tripod Stand

-
50 Ohm PL 259 Cables and Connectors


-
Wood Parts and Hardware


These particular items can be purchased at your local hardware store such as Lowes or other Hardware store.
- 8 - 1 - 1/4" thick MDF board sheet
- ## - 1/2" wood strips
- ## - 5/32 I.D. Inch x 5/8 Inch O.D. Washer
- ## - 6 - 32x 1 1/4 Bolt
- ## - 6 - 32 Nut
- ## - #8 Neoprene Washer
- ## - M3 X 18 .50 Pitch Washers
- ## - M4 Washers
-
Antenna Mount and Radial Arm Storage PVC Pipe
These particular items can be purchased at your local hardware store such as Lowes or other Hardware store.
- 1 - 2” PVC Pipe 8” long
- 2 - 2” PVC Pipe Caps
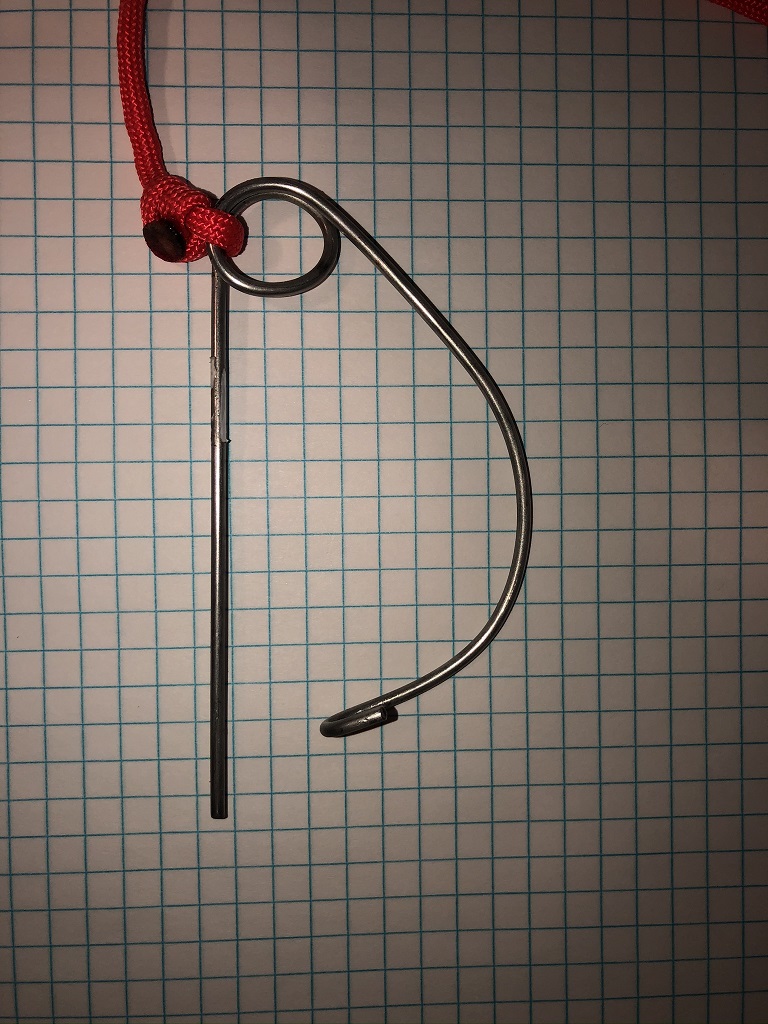
- 1 - 4” long cotter pin - Made from Welding Rod 3/32, 316 stainless steel
- 1 - Paracord section about 8” to 12” in length
Build out Instructions
-
Getting Started
Please note that these instructions are specific to the MTM Sportsman Plus Utility Dry Box. You'll need to download the template diagram with measurements and dimensions for creating the flat mounting boards and box guides that will be secured to the inside of the box. This document also contains all other custom build measurements and details such as the cotter pin and PVC pipe lengths and drill hole locations.
Download the template diagram jig here: (I have not yet been able to create the design drawings) . -
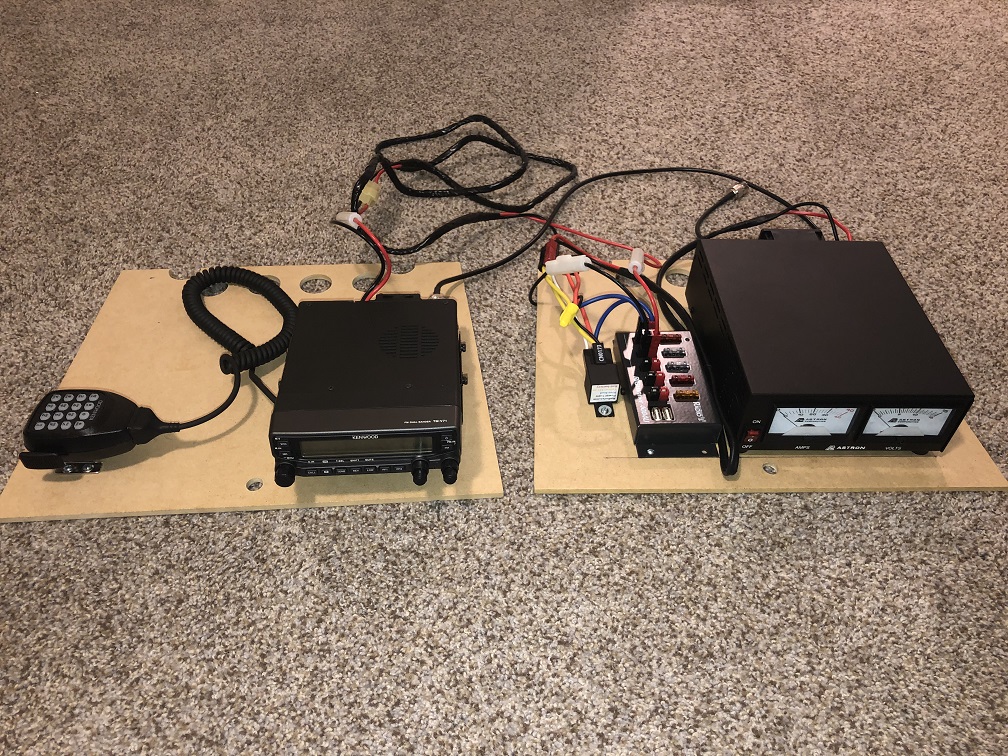
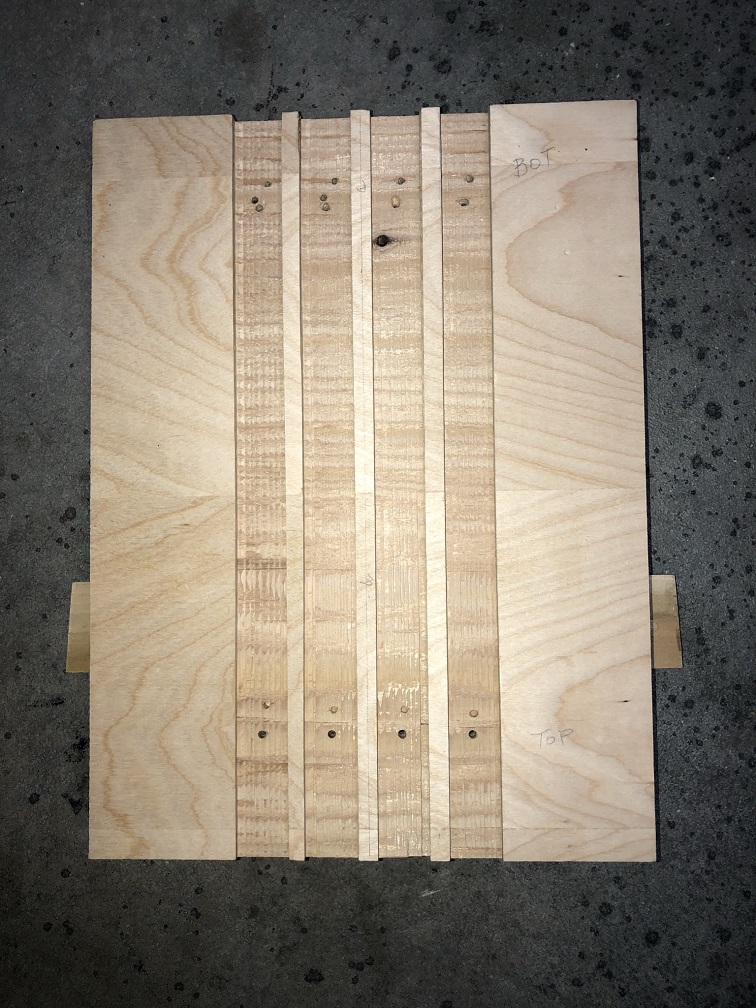
MDF Board
Using the Template Diagram and measurements mark on your 1/4" MDF board the various cut and drill marks. Follow the various steps found within the TemplateDiagram.pdf document to create your flat MDF boards. Note: you may need to ream out the drill holes slightly larger than the specified drill bit size.

-
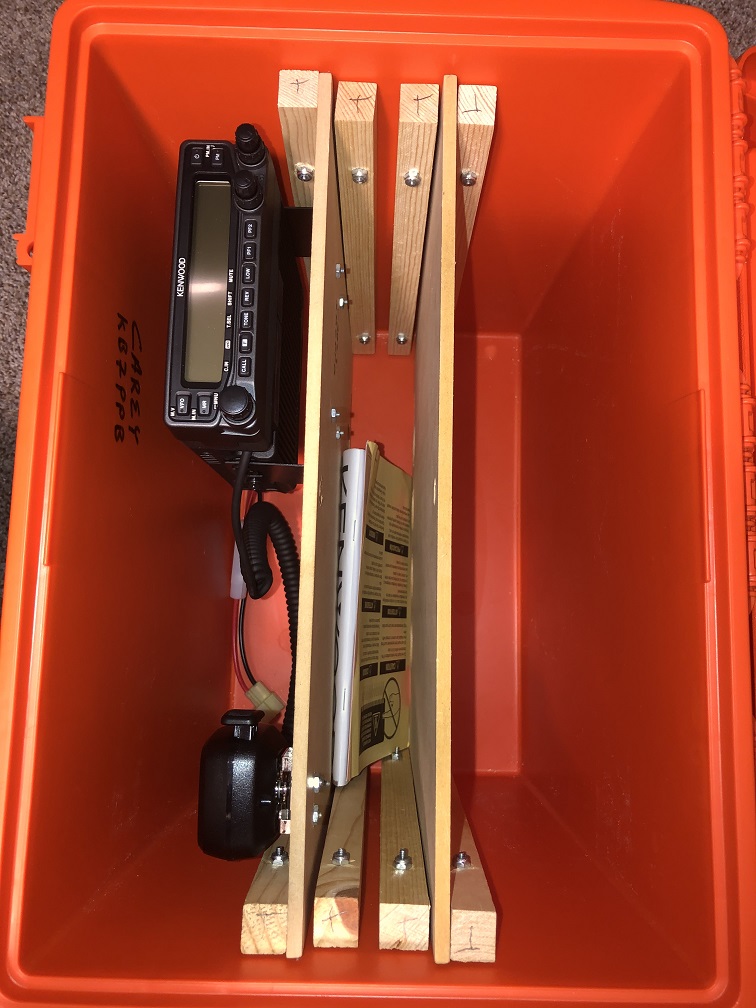
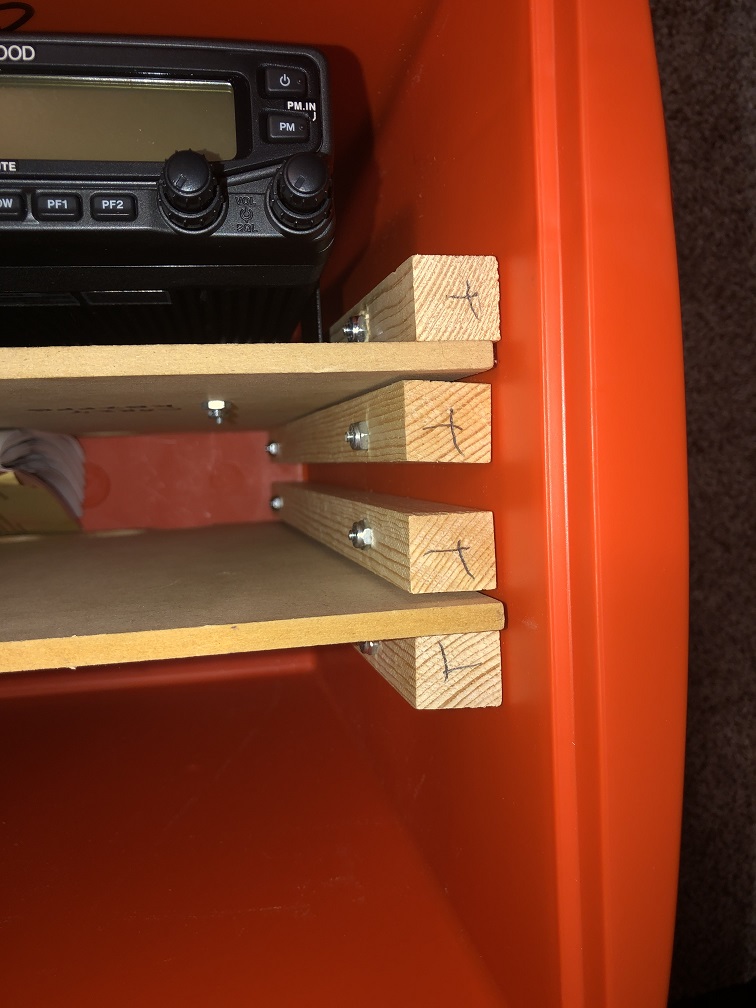
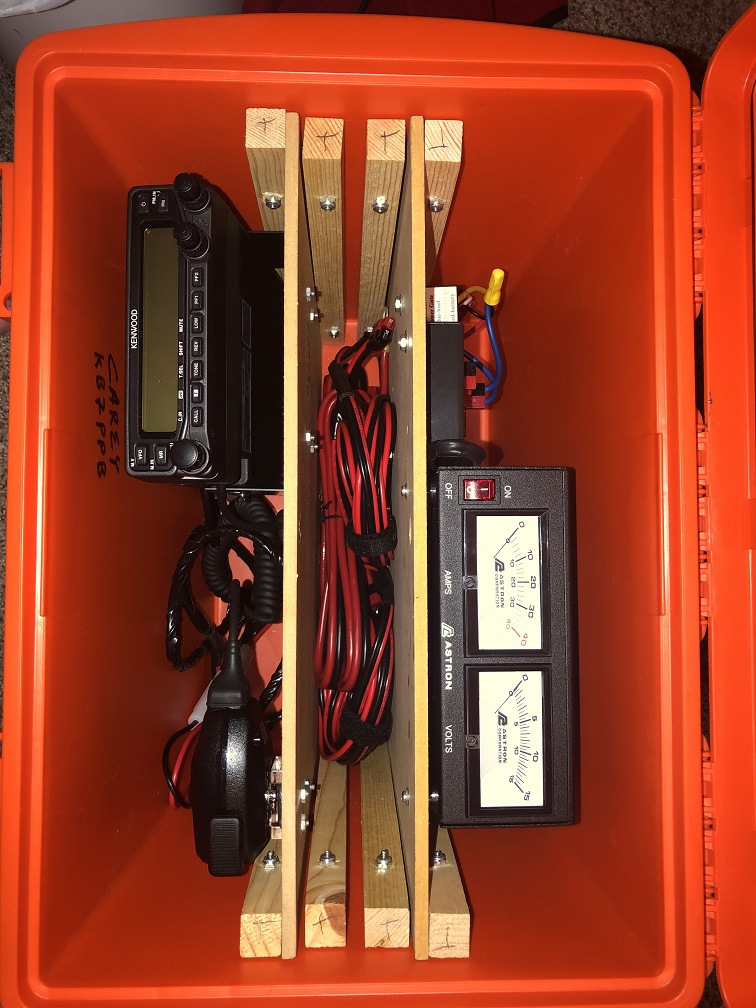
Wood Box Guides
Using the Template Diagram document cut eight wood shelf slats that will be used inside the box. These shelf slats will hold the MDF boards securely within the box.
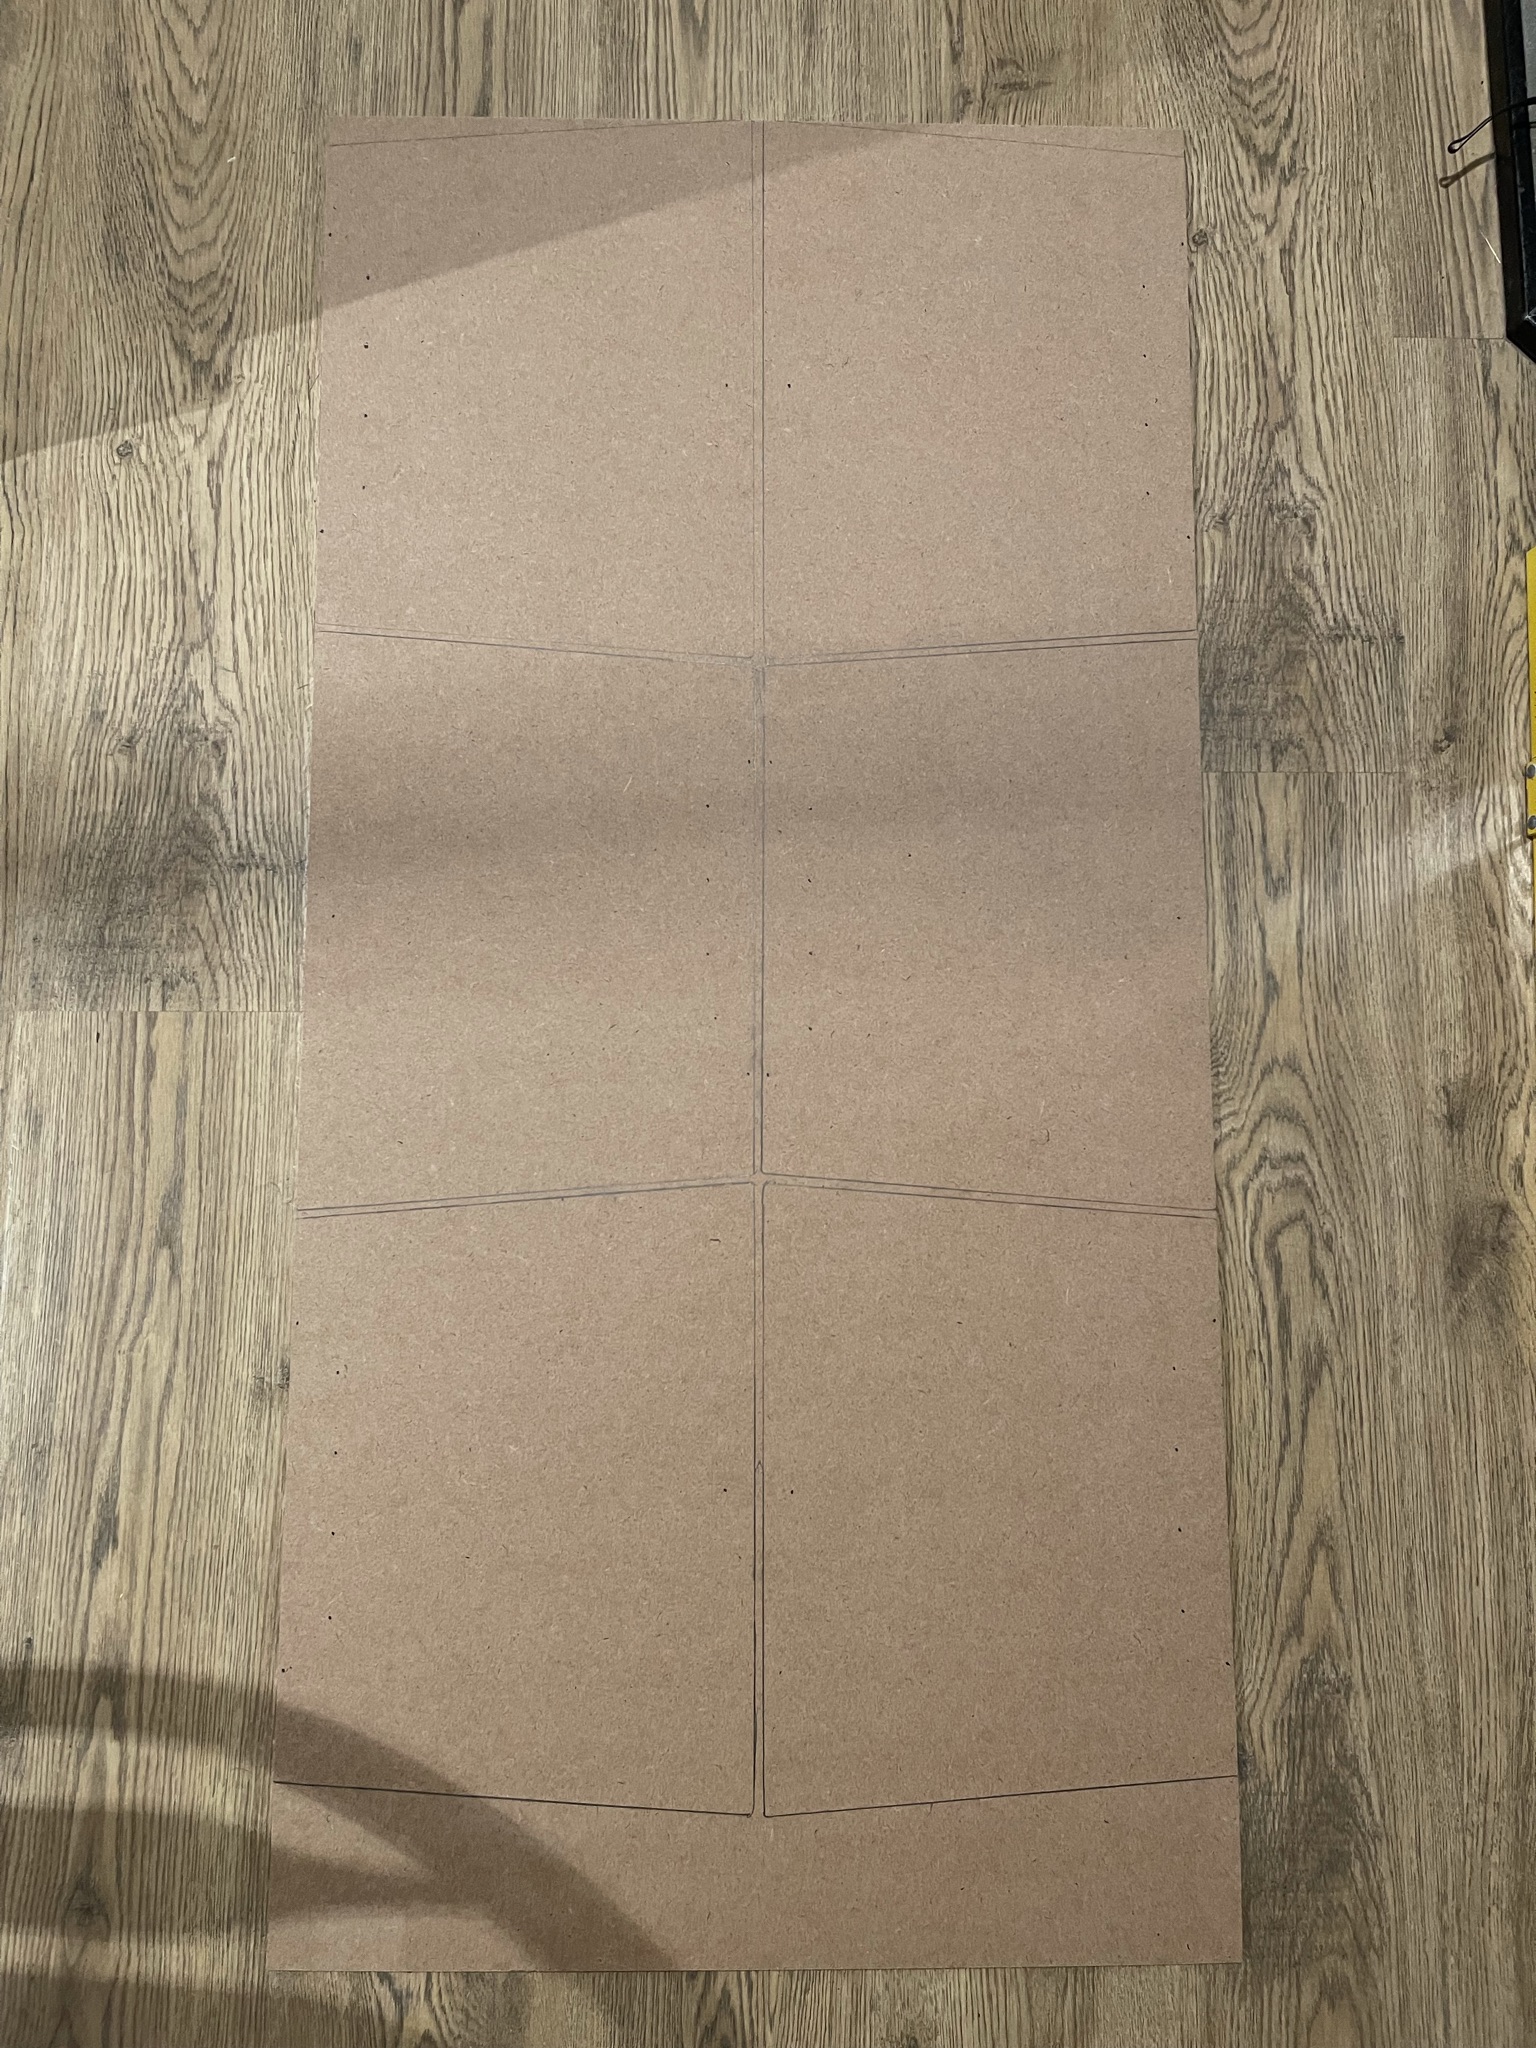
Within the Template Diagram document are the details on how to create the box jig. Take the time now to build the box jig.
Using the jig, insert it into the box. The jig should fit snugly in the box and provide drill hole guides for both the box and where to drill through the wood mounting shelf brackets slats.


With the wholes drilled in both the box and the wood slats you can secure the wood slats into the interior of the box. Locate the 16 bolts, nuts, neoprene washers and neoprene metal washers. Thread the neoprene with metal washer onto the bolts and insert from the outside pushing inward into the box. Thread the plain neoprene washer onto the bolt from the inside of the box. This will create a water resistant seal between the outside and inside of the box.
-
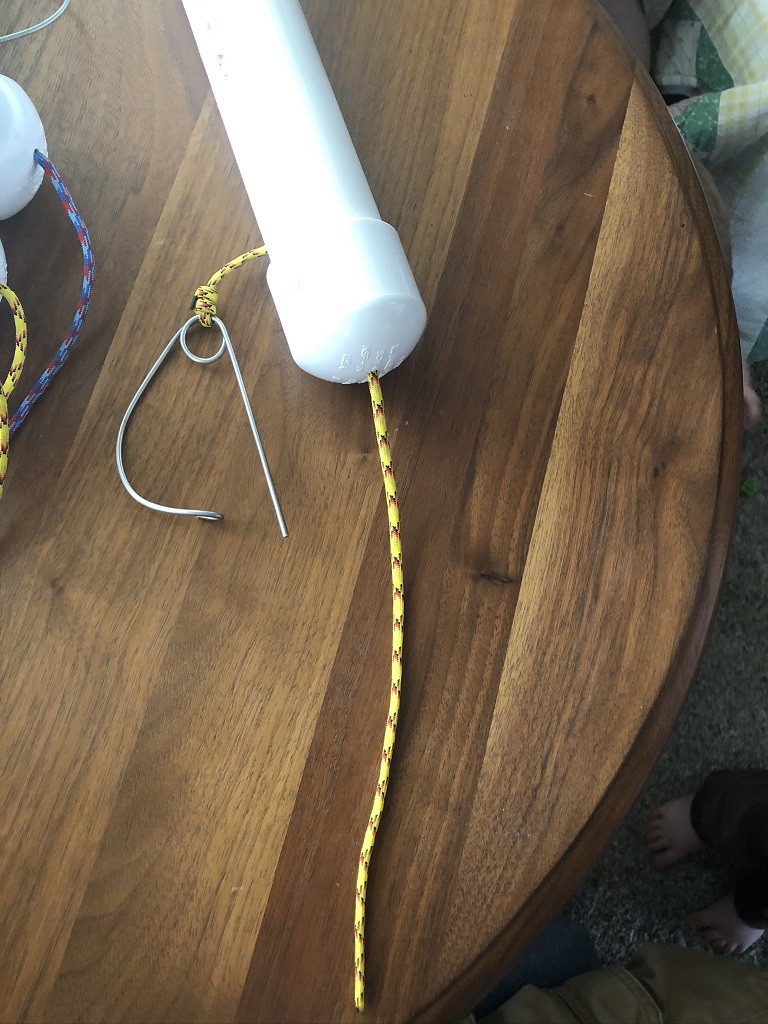
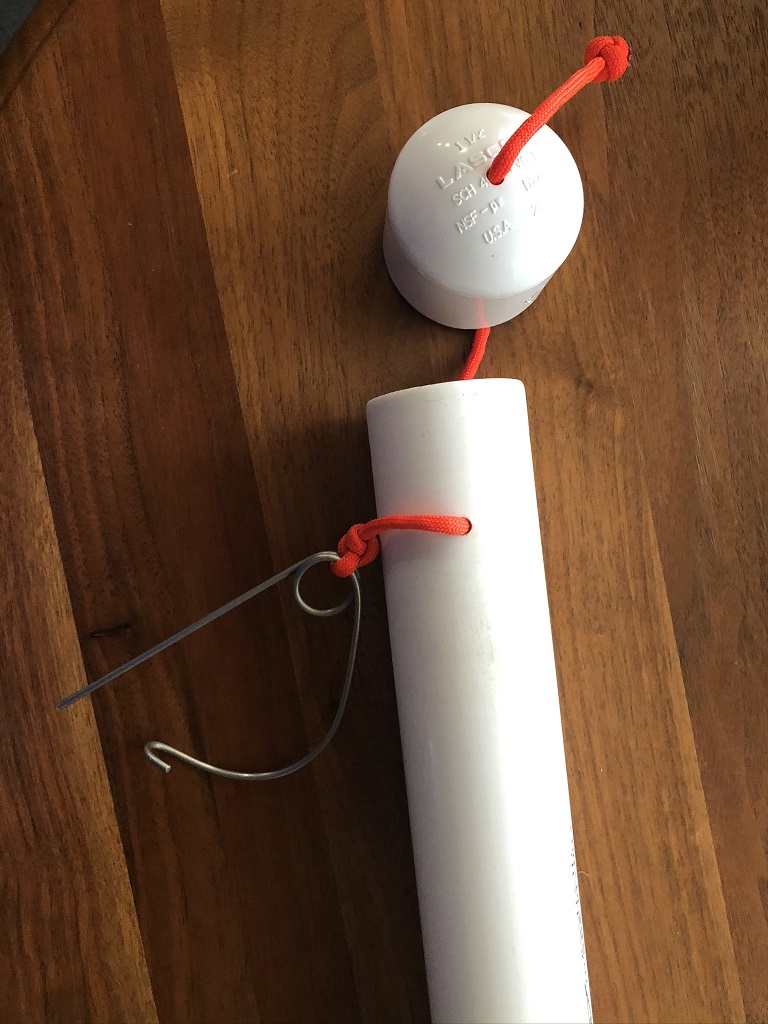
Cotter Pin
1 – 4” long cotter pin Made from Welding Rod 3/32”, 316 stainless steel

-
PVC Pipe mount for Antenna
After cutting your 8" length of 2" diameter PVC pipe take one of the two 2" end caps and using General Purpose PVC Glue secure it to the end of the PVC pipe so that it is permanently affixed to the pipe. Wait the required time for the glue to properly harden.

Once the glue is set you can then take the other end cap and begin working with it on the other end of the PVC pipe. Take 200 grit sandpaper and being sanding the un-capped end of the PVC pipe to reduce the diameter of the pipe slightly so that the 2" PVC end cap can, without much difficulty, slip on and off the end of the pipe. You will want it to seat down completely on the end of the PVC pipe and then be able with a slight twist remove the end cap. Once you have sanded the end you can apply a light coating of lithium grease or other lubricant to make it easier to slip on and off. With use the cap will become easier to remove and replace.
Once the you can easily remove and replace the end cap. Seat the end cap onto the PVC pipe and follow the measurement and drilling instructions in the Template Diagram document. Take the 8" or 12" paracord and tie a stopper knot on one end of the cord and heat glue it so it cannot come loose or undone. Slip the cord through the end cap and the PVC pipe. Tie another stopper knot and heat glue the other end.

-
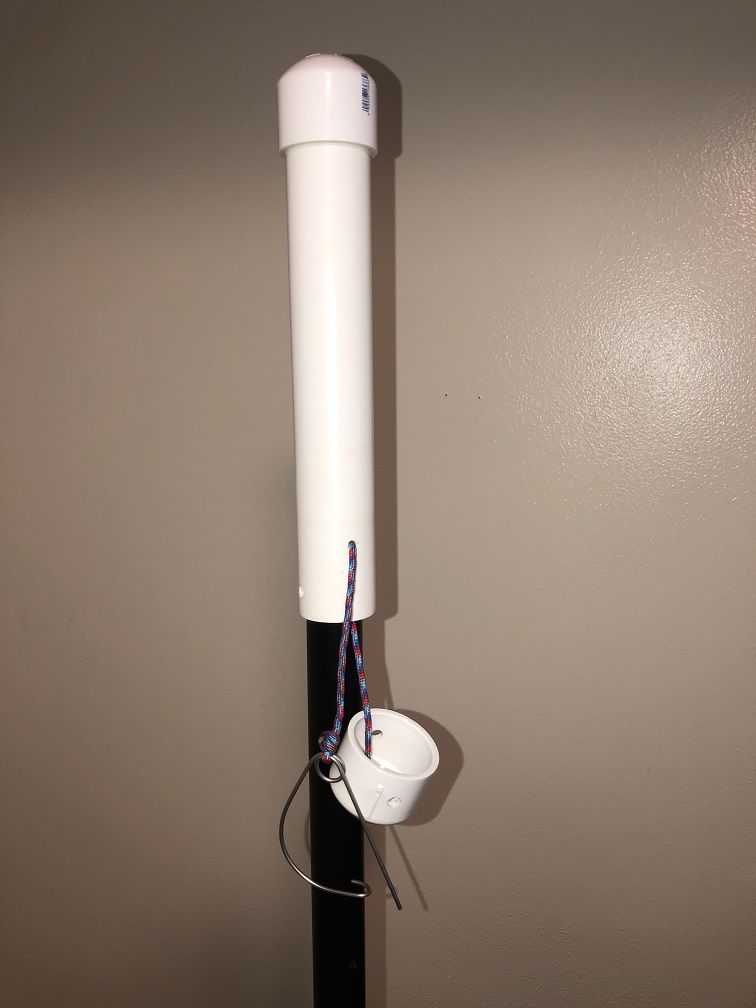
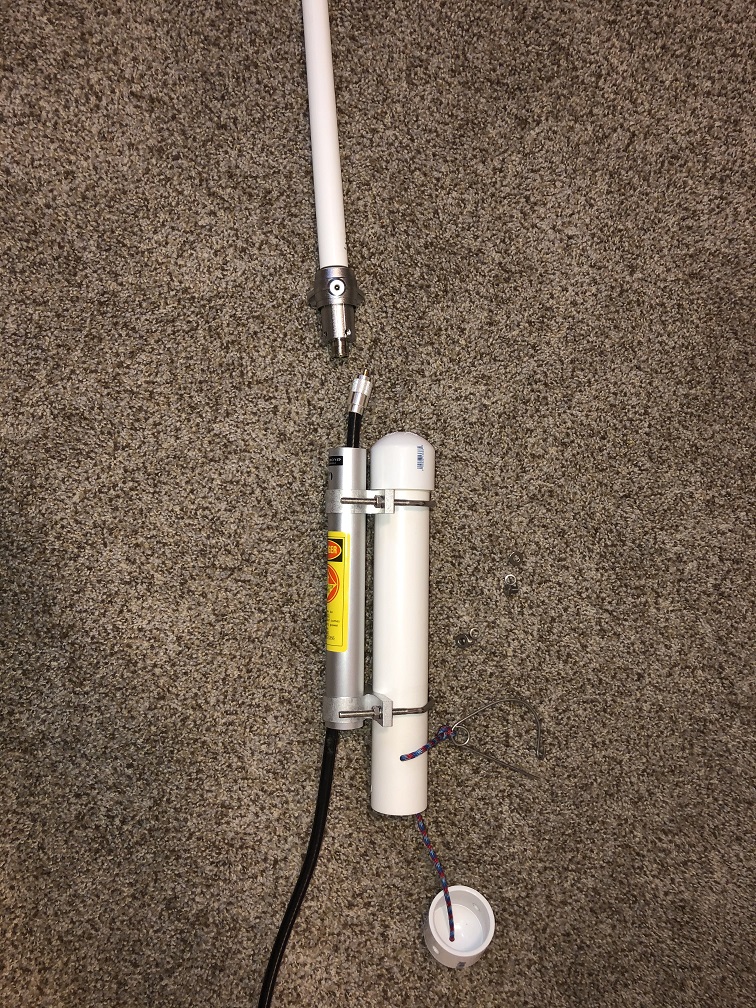
Mount Antenna to PVC pipe
Gather all of the parts together to assemble the antenna and antenna mounting PVC pipe. The parts should consist of:
- 1 - Fabricated PVC Pipe for holding the Antenna Radials
- 3 - Radials
- 1 - Fiberglass encased Antenna
- 1 - Antenna mounting tube
- 2 - U Bracket Holders
- 2 - U Brackets
- 4 - Nuts that attach to U Brackets
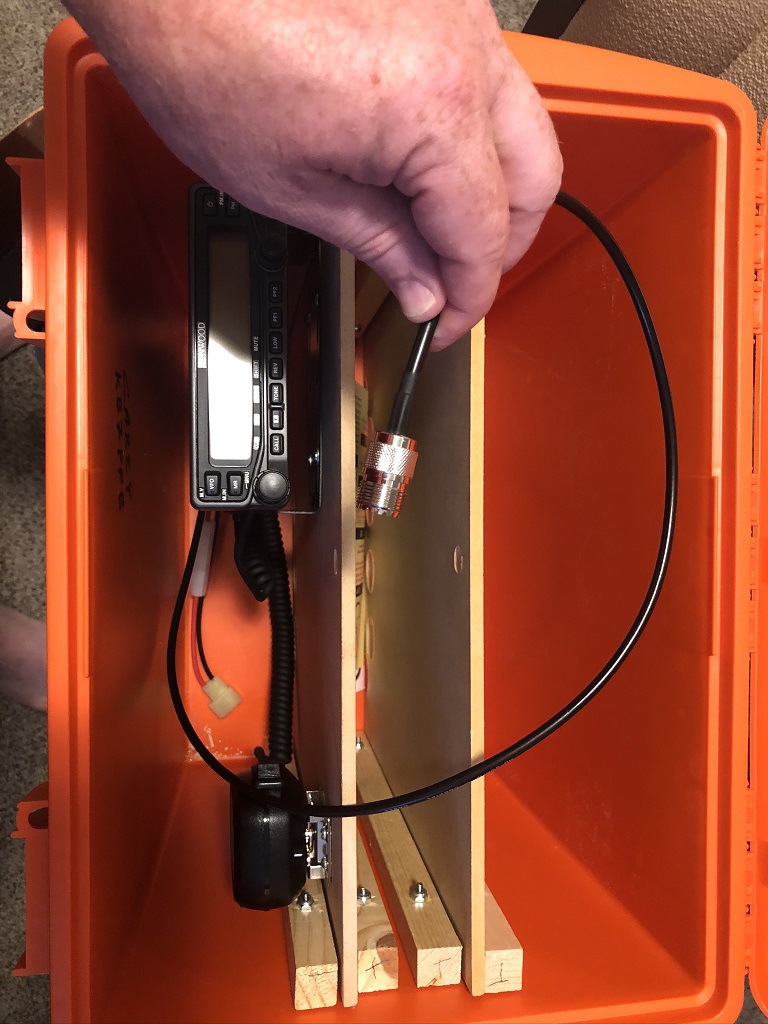
- 1 - 1 to 3 foot long 50 ohm coax pig tail
Take the antenna mounting tube and the U bracket holders and attach them to the metal antenna holder for the Diamond Antenna. Be sure to avoid blocking the set screws that secure antenna into the metal holder.

Feed the U brackets through the holders and attach the nuts to the other side so that the U bracket holders do not fall out. Once done feed the PVC pipe through the U bracket holders along side the metal bracket and tighten the U brackets down to hold the PVC pipe in place. Be sure not to over-tighten the U brackets as you do not want to crack the PVC pipe. But it must be secure enough that it does not move at all.

Feed the coax through the metal tube up to the antenna and secure the coax cable to the antenna. Slip the antenna into the metal end and use the two set screws to secure the antenna to the metal antenna holder. The fiberglass cased antenna when held vertical should point up and the bottom of the PVC pipe should be down. The cotter pin and removable cap should be at the bottom.
When complete the antenna with radials attached should easily be mounted on the antenna tripod holder.
-
Radio Go Kit Box
The box when finished will contain your power supply, a batter backup automatic switch, a VHF / UHF and HF radios with various cables and wires.